
It seems like kitchens are often the No. 1 thing people update when buying a house, and I will admit, I would LOVE to gut ours and design a fantastic kitchen. However, we’re on a DIY budget so since a remodel probably won’t happen for at least 10 years, I decided that we needed to do a few modest updates to make me still able to enjoy the kitchen.

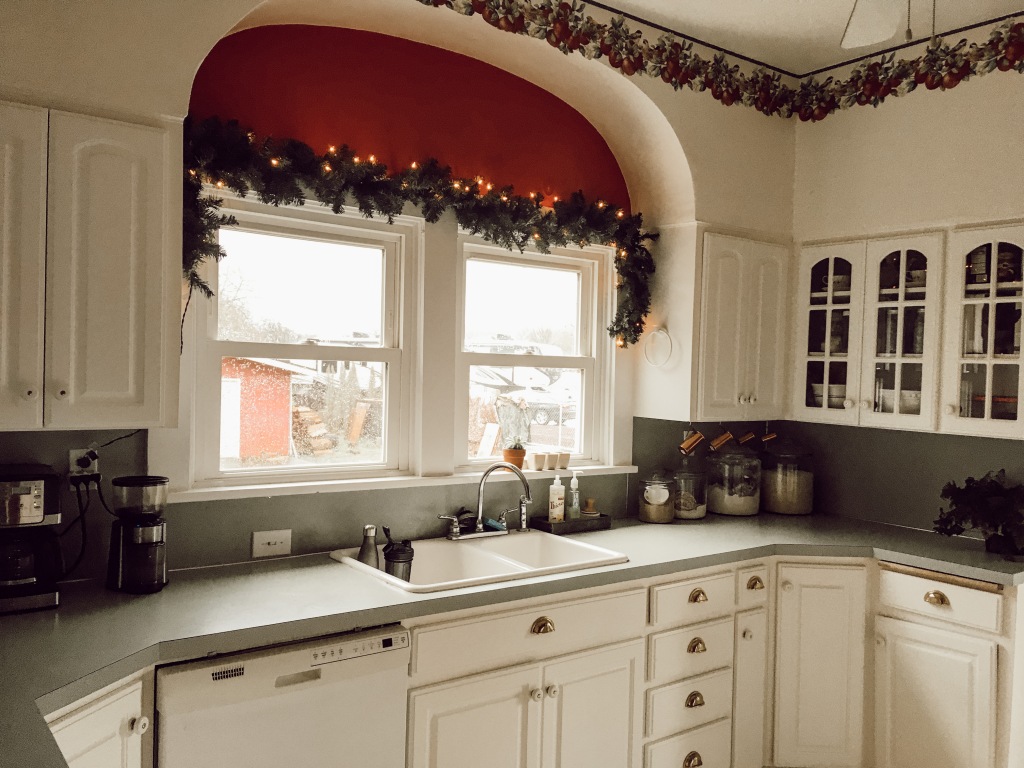

Lots of red, a wallpaper border with apples, green laminate…let’s just say it’s not my style. So how do you update this on a budget you ask? Let me tell you all about my plans, he he! 🙂
This update is based on a few tutorials I found:
1. DIY cement counters: basically you cover your current laminate with cement (but instead of making a form and pouring concrete, you mix it at an “icing” consistency and “ice” your counters like you’re icing a cake) and then seal them. I found this in Cotton Stem’s “Farmhouse Hacks” blog series, but she simply pointed to the Young House Love tutorial, so here that is.
2. Faux Shiplap: I also found this in Cotton Stem’s “Farmhouse Hacks” blog series, but many other examples can be found online. The one I’m going to ape was by Our Faux Farmhouse where Brad used 1/8″ panel board that they had the store rip into 6″ boards. (sorry, there is no specific DIY to link.)
3. Subway tile “stickers”: I saw Plum Pretty Décor and Design (she’s no longer blogging, but she left her site up so you can still go peek at her great style!) use these on her trailer makeover and I was like, YES, I NEED THOSE IN MY LIFE! I used subway tile contact paper in our rental and while it really made the place look a lot better, it did bother me that it didn’t look real. These don’t look perfectly real either, to be completely honest, but it’s a step up from contact paper and real subway tile is not happening at this point.
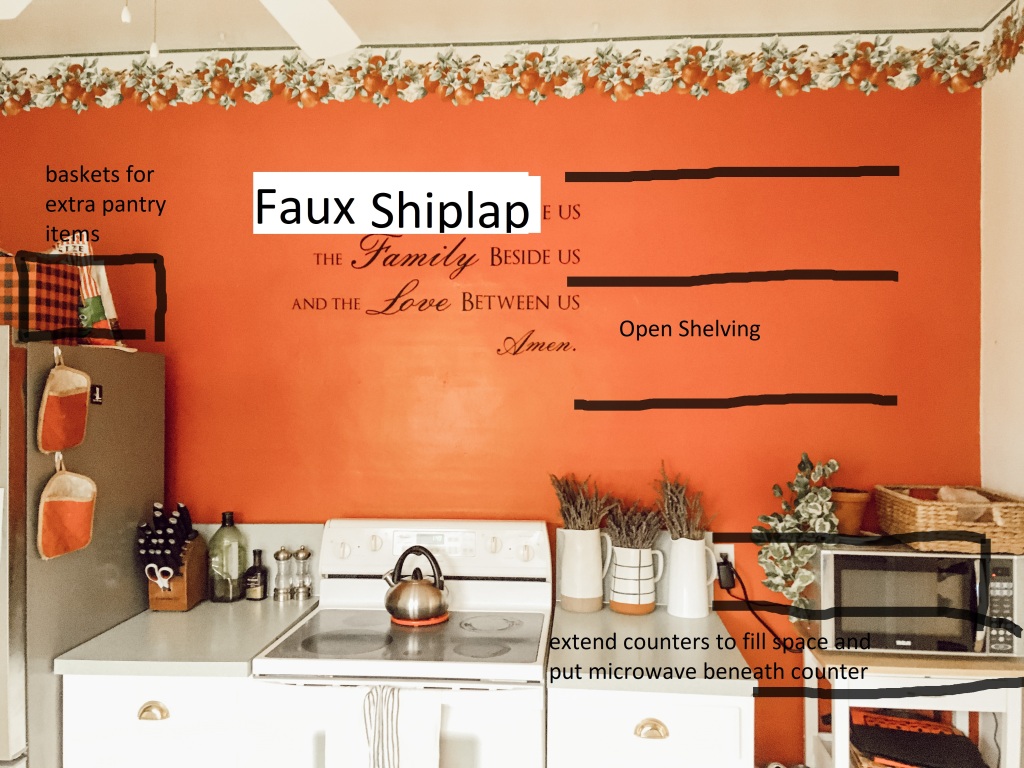
First I plan to cover this red wall with the faux shiplap. Then I’ve asked my husband to build a cabinet that will extend the counter to the wall in that odd spot and hold the microwave under the counter (I hate having it out on the counter, it’s just one of those things that bothers me). Then we’ll do the cement counters (wish me luck!) and add some finishing touches like open shelving and baskets above the fridge.

The other side of the kitchen will also get the concrete counter treatment, plus this is where the subway tile stickers will go. I know these are terrible mockups, but you’ll just have to use your imagination. Sorry.

I do have most of the supplies already, so I leaned a few of the stickers up against the backsplash to give you an idea of what I’m thinking. There is a peel-off front, so they won’t be so shiny once they’re on for real.

So now, what you’re all wondering i’m sure, “What exactly do you mean by ‘budget’? How much will all this REALLY cost?”
If all goes to plan, this should cost US about $150. This is where I’m kind of cheating though, you see the reason this is going to be so cheap is that I asked for most of the supplies as my Christmas gifts. Here is the breakdown.
Ardex Concrete (2 bags) $72.22
Acrylacq $42.99
511 Impregnator Sealer $25.67
Peel and Stick Subway Tiles (3 packs) $137.91
I asked everyone who gifts to me to send Amazon giftcards and combined them to order these supplies! Honestly, that is what is making this possible!
Here are the remaining items we will have to purchase:
-Panel Board for faux shiplap. These are $13 each and I anticipate needing 4-6.
-Wood for my husband to build that cabinet at the end of the counter. Hopefully we’ll be able to use some that we already have, but he estimated the cost at $70.
-Wood for the open shelves. I did buy corbels a while ago on a clearance sale but i’m not going to count that cost as part of this project. I probably should…but I can’t remember how much they were.
-We may end up needing one more pack of subway tile stickers, but we’ll cross that bridge when we come to it.
But wait you say, Adrienne, haven’t you forgotten the FLOORS?

No, I haven’t forgotten it, but it’s just going to have to stay for now. Maybe a vinyl stencil is in my future, but those aren’t cheap either. Next Christmas, ha ha.
I hope to get started on this in May, when my husband is done teaching for the summer (he is a math professor at a local university, so he has summers mostly off). I will be sure to keep you updated and do tips and tutorials for each step!
Thanks for coming along to see my plans! Do you have any projects planned, or any spaces you’re dreaming about making over?

2 thoughts on “Plans for the Kitchen”